Claiming & Defenses: Difference between revisions
General Fix ups |
Minor Formatting Changes |
||
| (5 intermediate revisions by 3 users not shown) | |||
| Line 24: | Line 24: | ||
*** Grants '''HP''' to blocks within its radius, making them harder to break. | *** Grants '''HP''' to blocks within its radius, making them harder to break. | ||
** Your claim is '''not invulnerable''' attacks can still happen. | ** Your claim is '''not invulnerable''' attacks can still happen. | ||
** Provides protection at a daily upkeep cost of [[File:Emerald.png|frameless|32x32px]] <code> | ** Provides protection at a daily upkeep cost of [[File:Emerald.png|frameless|32x32px]] <code>32 emeralds.</code> | ||
* '''[[File:Player head.png|frameless|32x32px]] Player Detection:''' | * '''[[File:Player head.png|frameless|32x32px]] Player Detection:''' | ||
** While you are inside a claim, all players will be able to see you on 🗺️ [https://minto.xyz/map map]. | ** While you are inside a claim, all players will be able to see you on 🗺️ [https://minto.xyz/map map] (Invisibility potions hide the player from the map, even in claims). | ||
** Players can check if they are inside a claim by using the in-game tab list | ** Players can check if they are inside a claim by using the in-game tab list | ||
| Line 44: | Line 44: | ||
Node upgradable tiers list: | Node upgradable tiers list: | ||
* <code>Tier 1</code> - [[File:Emerald.png|frameless|32x32px]]<code> | * <code>Tier 1</code> - [[File:Emerald.png|frameless|32x32px]]<code>32 emeralds</code> - <code>750 HP</code> | ||
* <code>Tier 2</code> - [[File:Emerald.png|frameless|32x32px]]<code> | * <code>Tier 2</code> - [[File:Emerald.png|frameless|32x32px]]<code>64 emeralds</code> - <code>1000 HP</code> | ||
* <code>Tier 3</code> - [[File:Emerald.png|frameless|32x32px]]<code> | * <code>Tier 3</code> - [[File:Emerald.png|frameless|32x32px]]<code>256 emeralds</code> - <code>3000 HP</code> | ||
Each node you place is <code>Tier 1</code> by default, & adds the additional cost of[[File:Emerald.png|frameless|32x32px]]<code> | Each node you place is <code>Tier 1</code> by default, & adds the additional cost of[[File:Emerald.png|frameless|32x32px]]<code>32 emeralds</code> to your anchors upkeep | ||
* Defines a spherical '''<code>96-block</code>''' protection radius around it. | * Defines a spherical '''<code>96-block</code>''' protection radius around it. | ||
| Line 68: | Line 68: | ||
[[File:Moatv2.png|frameless|514x514px]] | [[File:Moatv2.png|frameless|514x514px]] | ||
== [[File:Nest.png|frameless|32x32px]] | == [[File:Nest.png|frameless|32x32px]] Builds == | ||
=== THIS SECTION NEEDS REFINING!!!! === | |||
Builds allow for sub-claims to be created. '''(outdated screenshot)''' | |||
[[File:NestGUI.png|frameless|557x557px]] | [[File:NestGUI.png|frameless|557x557px]] | ||
* '''How they work:''' | * '''How they work:''' | ||
** | ** Players on a build automatically gain <code>Trusted</code> access, allowing them to interact with <code>Trusted</code> blocks & see the claim's [[File:Emerald.png|frameless|32x32px]] upkeep. | ||
**Players with anchor access are able to define the nests area. (default is <code>X: | **Players with anchor access are able to define the nests area. (default is <code>X:12,Y:16,Z:12</code>) | ||
**Builds automatically kick out in-active players after <code>3 days</code>. ''(set value & cannot be edited)'' | |||
**Players can earn emeralds on the buildings they create by selecting the employ option | |||
* ''' | * '''Building Rating:''' | ||
** | ** Click the Rate Building button will give you a rating between 1-10 | ||
** | *** Higher rating = more emeralds & employment slots | ||
*** To collect the emeralds the player must be employed on the building & select the collect income button | |||
== [[File:Paper.png|frameless|32x32px]] Paper Utility == | == [[File:Paper.png|frameless|32x32px]] Paper Utility == | ||
Latest revision as of 18:10, 14 June 2025
NOTE: Wiki page is still under construction!
Setting Up a Claim[edit | edit source]
This guide explains how to set up and manage land claims on a Minto-enabled Minecraft server using anchors, nodes, nests, and paper.
Claims help protect your builds, control access, and engage in the server’s raiding system.
 Anchors[edit | edit source]
To safeguard your loot and structures, you must establish and maintain a claim. Anchors serve as the core of your protection system.
Protection & Governance[edit | edit source]
A few important tidbits to keep your things safe...
- How they work:
- Acts as the core of your protected area so keep it secure!
- Defines a spherical
96-blockprotection radius around it.- Grants HP to blocks within its radius, making them harder to break.
- Your claim is not invulnerable attacks can still happen.
- Provides protection at a daily upkeep cost of

32 emeralds.
 Player Detection:
- While you are inside a claim, all players will be able to see you on 🗺️ map (Invisibility potions hide the player from the map, even in claims).
- Players can check if they are inside a claim by using the in-game tab list
- Misc. Information:
- Visibility delay: there is a short delay before your claim appears on the 🗺️ map.
- Break an anchor with any tool will drop it
- Remember to click the
trial keyto set a code, or else everyone can easily access your claim
 Nodes[edit | edit source]
Anchors can only get you so far. Nodes can greatly strengthen and extend your claims protection.
- How they work:
Right-clickingon the node will prompt you with the ability to upgrade it
Node upgradable tiers list:
Each node you place is Tier 1 by default, & adds the additional cost of![]()
32 emeralds to your anchors upkeep
- Defines a spherical
96-blockprotection radius around it. - You should have your nodes
76-96 blocksout from the anchor- Why? Node blast radius exists, along with the further out the node is the more protection it grants
- Node blast radius:
- Once a node has been broken all the blocks within a
~32 block radiusof them will lose their HP- Attackers are able to target specific points of your base & gain easy loot
- Once a node has been broken all the blocks within a
Placing nodes and anchors will only get you so far. Another aspect you need to focus on is setting up block-based defenses
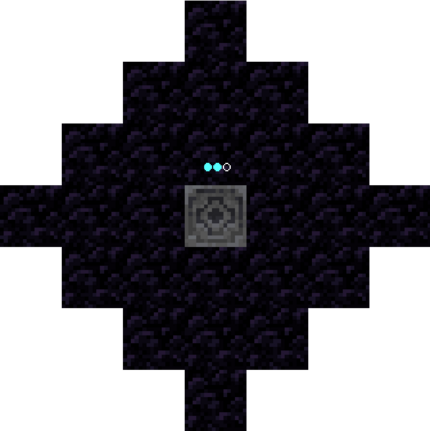
Surrounding your nodes with Obsidian is best, as it takes less damage compared to other blocks, making raids take much longer.
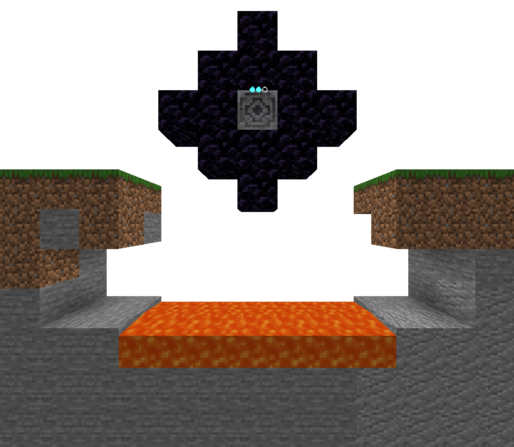
You can also go a step further by utilizing lava or water to defend your nodes:
 Builds[edit | edit source]
THIS SECTION NEEDS REFINING!!!![edit | edit source]
Builds allow for sub-claims to be created. (outdated screenshot)
- How they work:
- Players on a build automatically gain
Trustedaccess, allowing them to interact withTrustedblocks & see the claim's upkeep.
 - Players with anchor access are able to define the nests area. (default is
X:12,Y:16,Z:12) - Builds automatically kick out in-active players after
3 days. (set value & cannot be edited) - Players can earn emeralds on the buildings they create by selecting the employ option
- Players on a build automatically gain
- Building Rating:
- Click the Rate Building button will give you a rating between 1-10
- Higher rating = more emeralds & employment slots
- To collect the emeralds the player must be employed on the building & select the collect income button
- Click the Rate Building button will give you a rating between 1-10
 Paper Utility[edit | edit source]
Paper is used for configuring who is able to interact with what.
Block access states:
Left-click any block inside a claim while holding ![]()
paper will cycle between access states.
Currently there are 3 access states:
None: Only players with anchor access can interact. (set by default)Trusted: Only trusted players and those with anchor, nest or alliance access can interact.Public: Anyone can interact with the block freely.
Trusted & Public block states only allow accept right-click interactions (doors, trapdoors, crafting tables, chests, etc.)
Example Claims[edit | edit source]
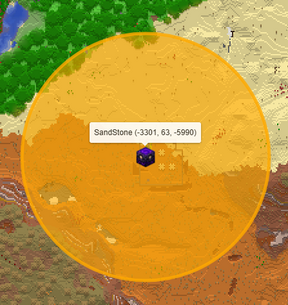
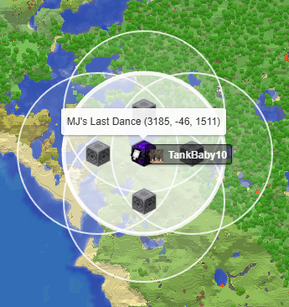
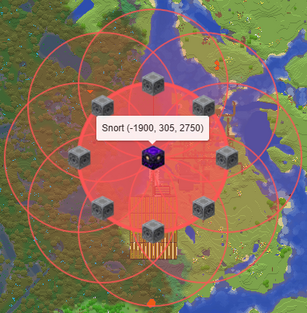
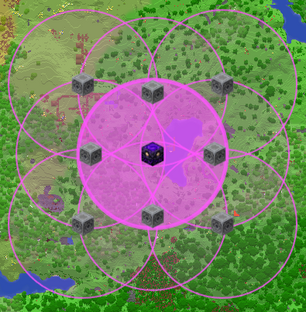
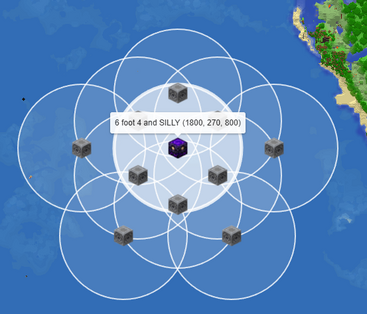
All claims listed below are some of the most common, yet most efficient claims you can place on minto.
Low Tier Claims:[edit | edit source]
Often these claims can be raided by only break 1 node or just going straight to the anchor
Medium Tier Claims:[edit | edit source]
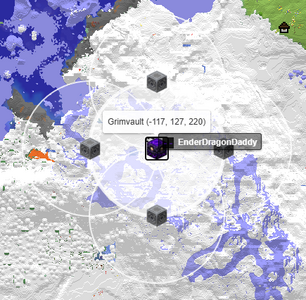
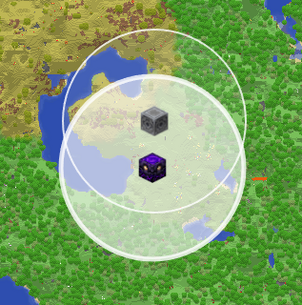
These claims offer a pretty good form of protection, forcing attackers to go through at least 2-3 nodes before they're able to break the anchor
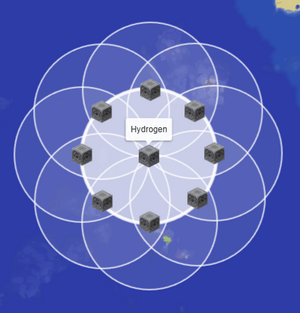
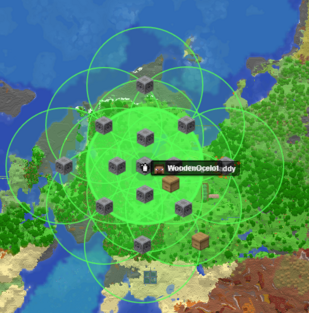
High Tier Claims:[edit | edit source]
An example of a hypothetical high tier claim would be an anchor that forces attackers to go through 4-6 nodes before they're able to break the anchor
None exist yet 😔
Advanced Claiming[edit | edit source]
Look at this section if you want to start designing custom claim layouts
This section isn't for the faint hearted...
Tldr: Ensure that the anchors circumference (the circles outskirts) are being shielded by the node (as seen in medium tier claims)
Last updated: 4 July 2025.


